Resolving Project Data Discrepancies via Snapshots
19/06/2026
Every time you open a project, the system validates the current data against its last saved snapshot. If discrepancies or inconsistencies are detected, Graph Modeling assumes potential data corruption, displays a warning message and triggers the following protective actions:
A control snapshot with the suffix
.ctrlis automatically generated and saved to the snapshot folder.The automatic snapshot mechanism is temporarily paused to prevent healthy, historical backups from being overwritten by potentially corrupted data.
Before taking action, determine whether your current project data or your snapshots are valid.
Compare your last regular snapshot with the newly created
.ctrlsnapshot to identify any changes.Check the system log files from the timestamps when both snapshots were created to pinpoint the issue.
Run the Data Validator to verify integrity of your data.
Option A: If you confirm your current project data is valid and healthy, you can resume normal operations by manually triggering a snapshot. This re-activates the automatic snapshot mechanism.
Option B: If your current data is invalid, you can restore it from any previous healthy snapshot.
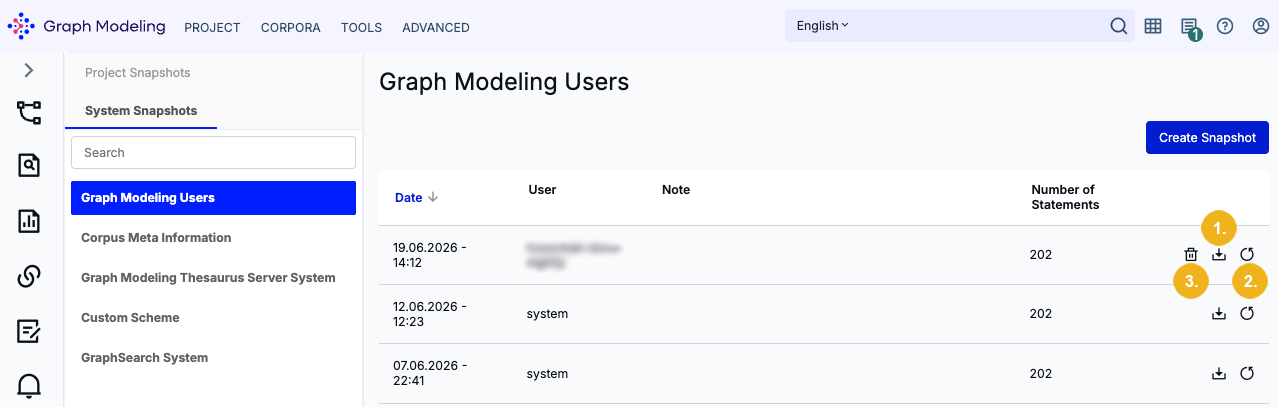
Select the desired healthy snapshot from the list.
Tip
You can download (1) the snapshot file to validate it first, or restore it to a temporary test project to verify its contents.
Click the Restore icon (2).
Warning
Restoring a snapshot will permanently overwrite your current project data with the backed up data.
After restoring your snapshot reload the project in the Graph Modeling backend to refresh the tree view and display the changes. Restored snapshots appear in the dashboard list under the username restored. You can delete these entries at any time using the bin (3) icon.
Note
If you want to restore a snapshot of a system repository, proceed in the same way as when restoring a project from a snapshot. Simply navigate to System Snapshots, select the target repository, and click the Restore icon in the far-right column of the desired snapshot. Once the restoren is complete, a confirmation message will display, a new entry will appear on the snapshot list, and your current repository data will be overwritten with the restored backup.