Generating and Extending a Taxonomy
02/02/2026
The Taxonomy Builder utilizes LLMs to automate the creation of structured taxonomies which currently takes place across two stages:
Building a hierarchy: An LLM-based approach to generate the foundational hierarchy skeleton, URIs, and preferred labels.
Adding alternative labels and definitions: LLM-based generation of altLabels and definitions in the default language to ensure concept clarity and search precision.
Note
We are currently working to expand the Taxonomy Builder's capabilities with the following features:
Expansion from Documents: The Taxonomy Builder will gain the ability to expand an existing taxonomy based on a user-provided corpus.
Language Localization: Implementation of LLMs for localizing labels and definitions of concepts, top concepts, and candidate concepts into multiple languages for global accessibility.
Adding Attributes and Relations: Integration of LLM and corpus-based methods to generate SKOS relations and ontology-based attributes/relations.
To access the Taxonomy Builder, navigate to the Thesaurus Management view of your project and either:
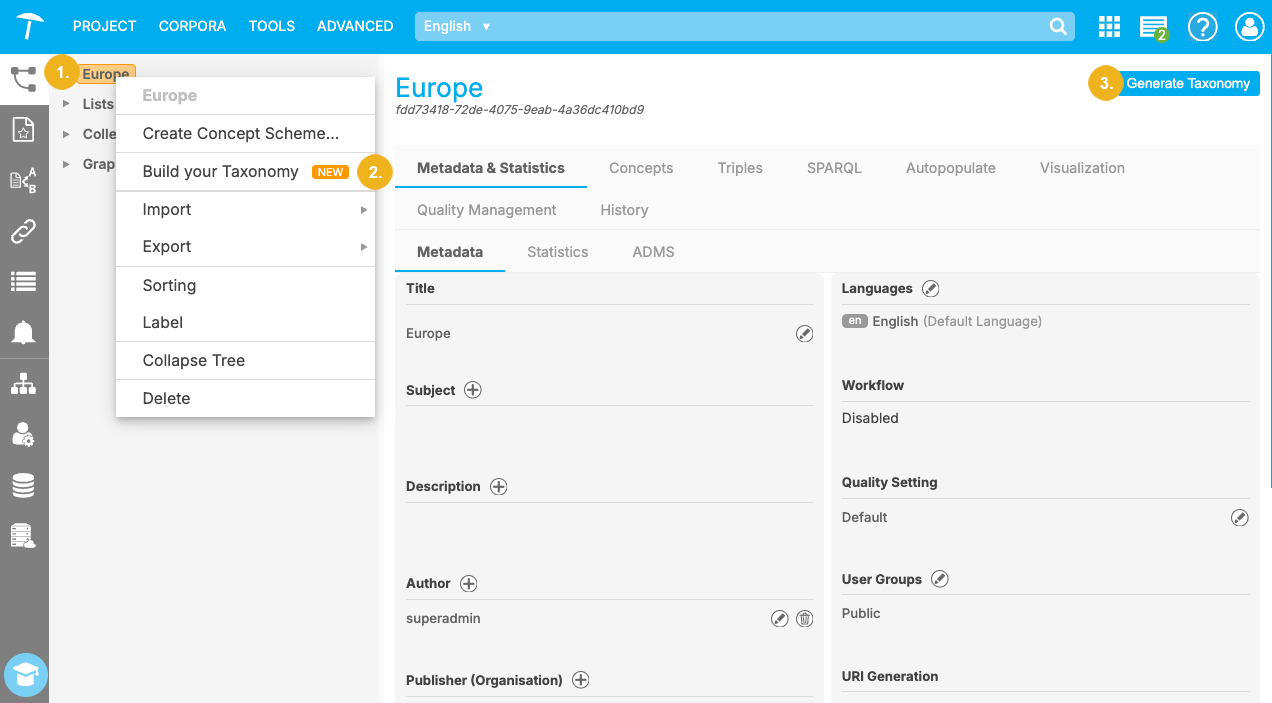
right-click any node in your taxonomy tree (for example, the project node) (1) and select Build your Taxonomy (2), or
click the Generate Taxonomy button (3) on the Details View of your project node.
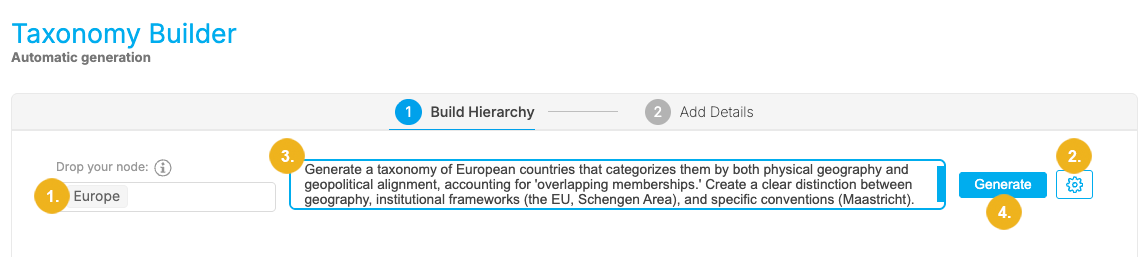
On the landing page of the Taxonomy Builder you can drag-and-drop any node from your taxonomy tree into the Source field (1) below the Drop your node label. If the Generate Taxonomy button was selected in the project's Details View the Taxonomy Builder will choose the project node to expand the taxonomy upon. Regardless of which node is dropped into this field, all existing narrower concepts originating from this node will be expanded unless explicitly excluded in the Parameter Settings (2).
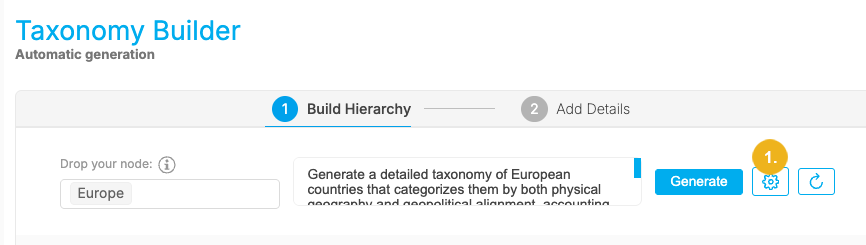
Optionally, enter a meaningful prompt in the input field (3) that describes the domain and the desired structure of the taxonomy.
The Taxonomy Builder automatically uses existing metadata as context for the LLM. This contextual information is included regardless of whether or not a prompt was provided, and scales based on your selection:
If a concept is selected the Taxonomy Builder uses the project description, the description of the parent concept scheme, and the definition of the selected concept.
If a concept scheme is selected the project description is used along with the description of the selected concept scheme.
Click Generate (4).
Clicking Generate opens the Taxonomy Builder workflow UI. This workflow consists of the following two steps:
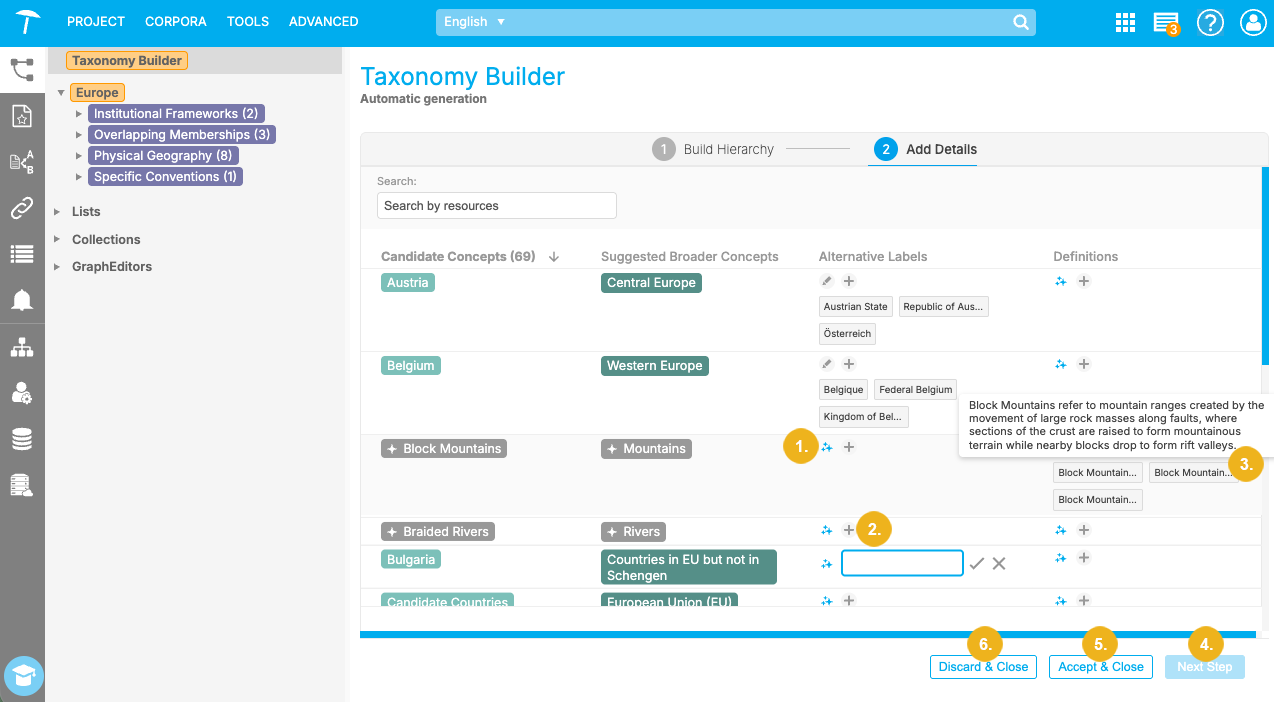
Build Hierarchy: This step allows you to organize candidate concepts and their suggested broader concepts. The taxonomy tree on the left (1) visualizes the suggested position of these candidate concepts.
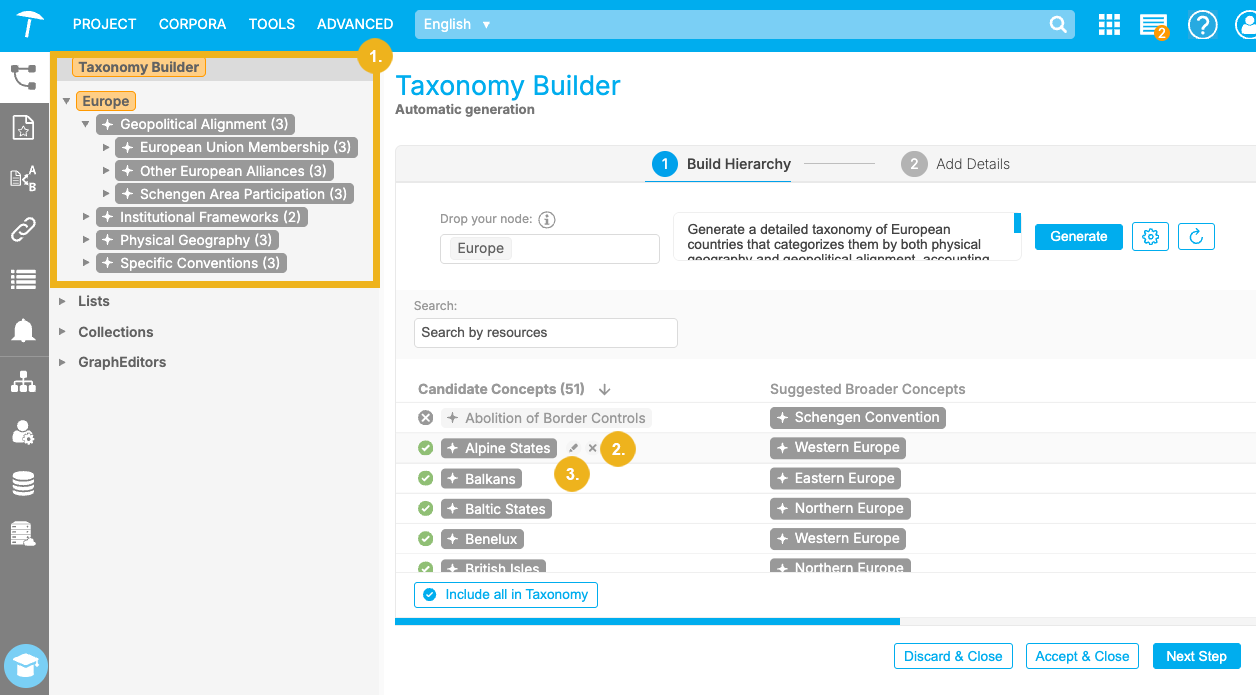
To deselect a candidate concept, hover over it and select the X icon (2). Deselected candidate concepts will show a + icon instead, which can be clicked to re-add the concept to the candidate concept list. To rename a candidate concept, hover over it and select the pen icon (3) and enter your desired label.
Concepts in the taxonomy tree can be dragged and dropped on top of suggested broader concepts to replace them. Once a suggested broader concept has been replaced, the taxonomy tree on the left will automatically update its structure.
Tip
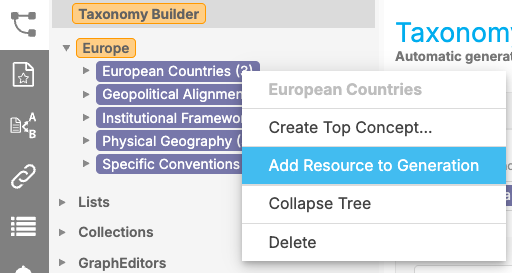
Continuously expand your taxonomy starting from different source nodes by dropping any concept from your taxonomy tree into the Source field. Alternatively, right-click any concept in your tree and select Add Resource to Generation from the context menu. Once you have selected your new source node click Generate. This workflow allows you to expand your taxonomy until it has reached the desired depth.
Add Details: Step two lets you generate labels and definitions for already existing concepts (those with a dark or light green background color) as well as generated candidate concepts (those with a grey background color). Click the Generate ("Sparkle") icon (1) to generate alternative labels and definitions for individual concepts. Hover over a generated definition to expand and view the text (2). Alternatively, select the '+' icon (3) to manually enter an alternative label or definition.
Note
Navigate between each step by selecting Next Step (4). When you are done fine-tuning, you can select Accept & Close (5) to apply the currently generated content to your taxonomy. Click Discard & Close (6) to exit the Taxonomy Builder, discarding all currently generated content.
A Taxonomy Builder session remains active until you explicitly click Discard & Close or Accept & Close. Your progress and generated results are tied to your user profile and the specific project; they will persist even if you switch tabs, navigate away, or log out of the system.
The following advanced Taxonomy Builder settings can be accessed via the gear icon (1) next to the Generate button:
Source parameters (1): Provides an overview of existing concept and concept scheme descriptions in the selected taxonomy. Detailed descriptions already present in your taxonomy lead to higher quality results during generation.
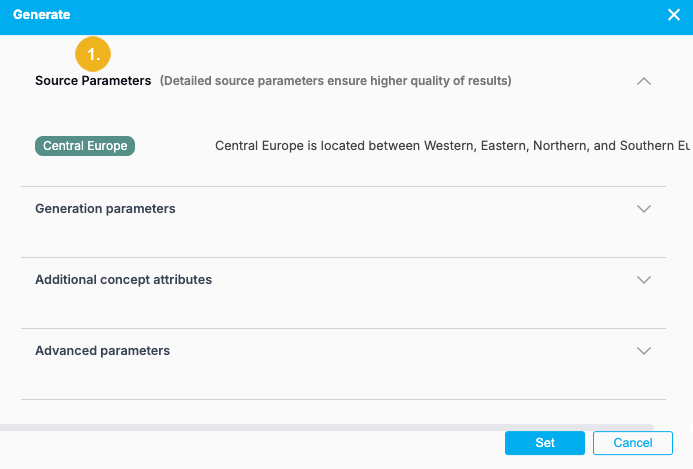
Generation parameters (2): Here you can find the following configuration options:
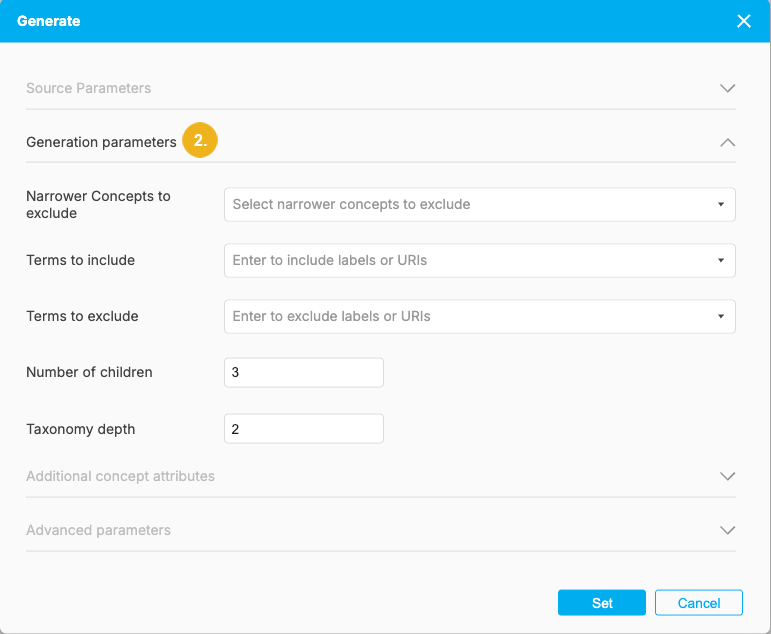
Narrower Concepts to exclude: When a node is selected on the first page of the Taxonomy Builder, its narrower concepts are automatically included as context. This setting allows you to select specific concepts to be bypassed during the generation process. While these concepts remain part of your taxonomy, the LLM will not take them into account or generate any further sub-concepts from them.
Terms to include: Provide a list of strings or terms. This guides the LLM by offering examples of the type of candidate concepts you are looking for.
Terms to exclude: Provide examples of terms or topics that should be avoided during generation. These serve as negative examples to help the LLM understand the boundaries of your domain; the system will aim to exclude both these specific terms and any conceptually similar ideas.
Number of children: Specify the number of child nodes you would like to have on each level for each expanded concept.
Taxonomy depth: Define the desired depth of your taxonomy starting from the selected node (max. depth: 4).
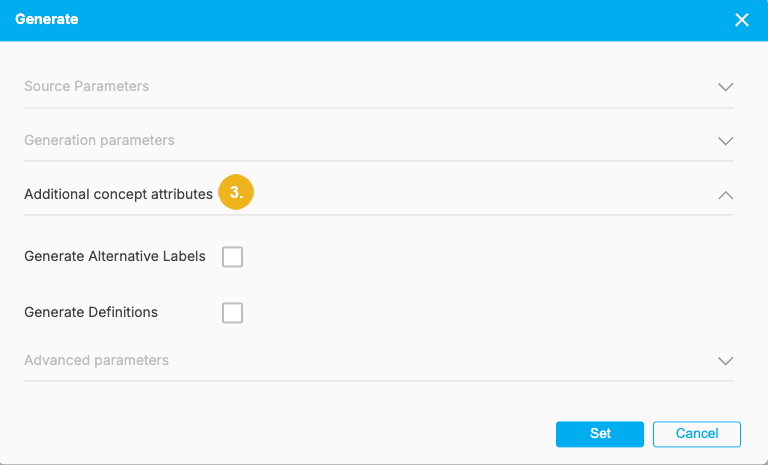
Additional concept attributes (3): Here you can enable or disable Generate Alternative Labels and Generate Definitions. This functionality is described on our help page on the Taxonomy Advisor.
Advanced parameters (4): Here you can enter a decimal number from 0-1 to define the Temperature of your generated results. Temperature is a parameter that controls the randomness of a large language model's output, with lower values making the output more predictable and higher values making it more random. You can also set the maximum number of tokens in the LLM response.
Note
The response will be truncated once it reaches the token limit and will probably be a malformed JSON. If you want more concepts and depth you can increase the number of tokens.
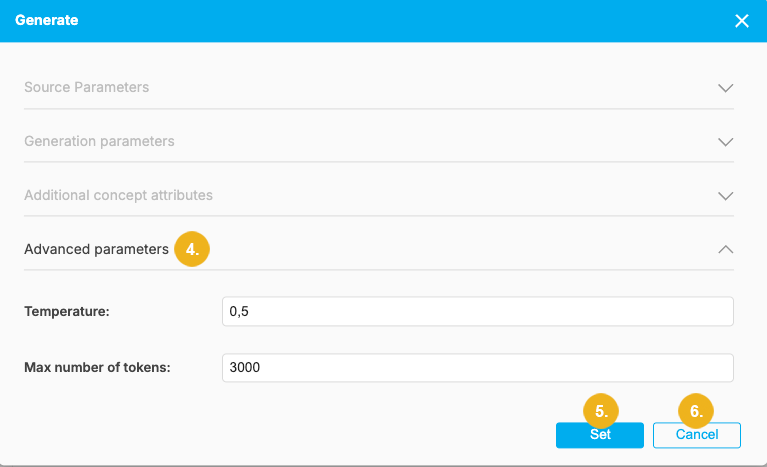
Once the desired parameters have been set, select Set (5) to apply. Click Cancel (6) to exit out of the dialog without saving.
Tip
Visit our help page Configuring External LLM Services for more information on how to set up and configure LLM-based features such as the Taxonomy Advisor and the Taxonomy Builder.