How to Trigger Auto-Tagging
15/06/2026
You can trigger the auto-tagging of items in document libraries and lists from their actions menu. If items have already been manually tagged or automatically extracted tags have been refined, you can choose to refresh the tags while preserving manual changes or reset the tags and retag the items.
Go to the site contents page. For more information, refer to the Microsoft SharePoint documentation.
Open the library or list.
Select all the items you want to auto-tag.
Select Get tags.
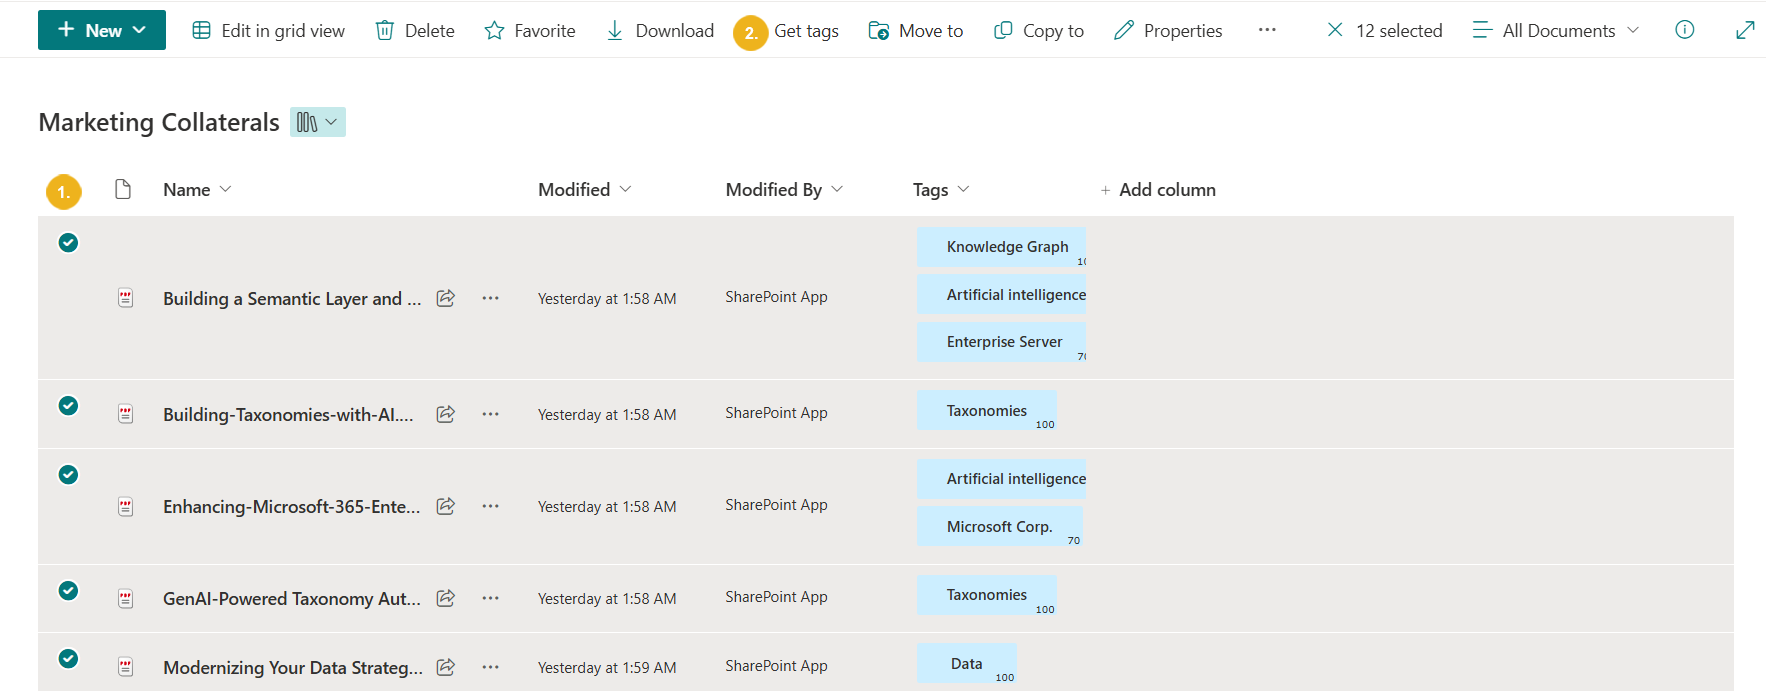
The Get tags dialog box opens.
If you are tagging these items for the first time, either select Refresh tags or Reset all tags.
If you have already manually tagged these items or refined tags automatically, do the following:
Select Refresh tags to retag the content while preserving all previous manual changes.
Select Reset all tags to retag the content while deleting all previous manual changes.
A message indicating that tagging is in progress is displayed. You can close this message or leave it open to view the number of tags refreshed or reset and identify any failed items.
Shortly, the tags that meet the requirements defined in the Graphwise for SharePoint Administration application appear in dedicated columns based on their taxonomies or concept schemes (if enabled). For more information on how to display a full list of identified tags, refer to How to View All Tags.
For more information on how to manage tags for an item, refer to How to Manually Add Tags, Refine Automatically Extracted Tags and How to Delete Tags.
Tip
Selecting a tag displays all items to which the tag is assigned.
Note
If you add an item to a document library or list later on, depending on the configuration made in the Graphwise for SharePoint Administration application, it will automatically be tagged or you must manually trigger the auto-tagging function.