Taxonomy Builder: Build Hierarchy
23/06/2026
This section provides an overview of the first step of the Taxonomy Builder workflow: Build Hierarchy.
Before starting the generation process you can provide an optional prompt and change the default parameters.
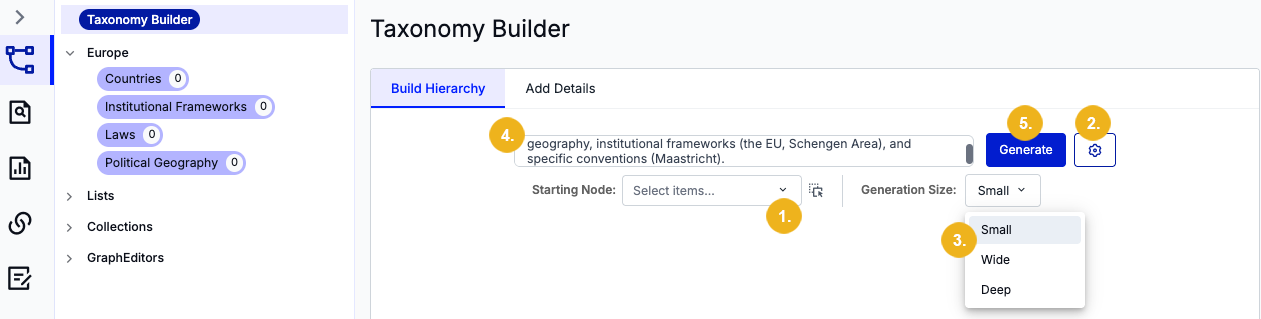
On the landing page of the Taxonomy Builder you can drag-and-drop nodes from your taxonomy tree into the field next to the the Starting Node: label (1). You can also click the Select items... drop-down menu and select any existing nodes from your taxonomy there.
Note
If more than one node is selected Taxonomy Builder will apply the same generation settings and prompt to each node individually.
If the Generate Taxonomy button was selected in the project's Details View the Taxonomy Builder will, by default, choose the project node to expand the taxonomy upon. Regardless of which node is dropped into this field, all existing narrower concepts originating from this node will be expanded unless explicitly excluded in the Parameter Settings (2).
The Generation Size (3) drop-down menu allows you to control the breadth and depth of your taxonomy from a list of presets:
Small (default): depth = 2; children = 3
Wide: depth = 2; children = 10
Deep: depth = 4; children = 4
The number of child nodes relates to the desired number of narrower concepts on each level for each expanded concept, whereas the depth corresponds to the desired depth of your taxonomy starting from the selected node.
Optionally, enter a meaningful prompt in the input field (4) that describes the domain and the desired structure of the taxonomy.
The Taxonomy Builder automatically uses existing metadata as context for the LLM. This contextual information is included regardless of whether or not a prompt was provided, and scales based on your selection:
If a concept is selected the Taxonomy Builder uses the project description, the description of the parent concept scheme, and the definition of the selected concept.
If a concept scheme is selected the project description is used along with the description of the selected concept scheme.
Click Generate (5).
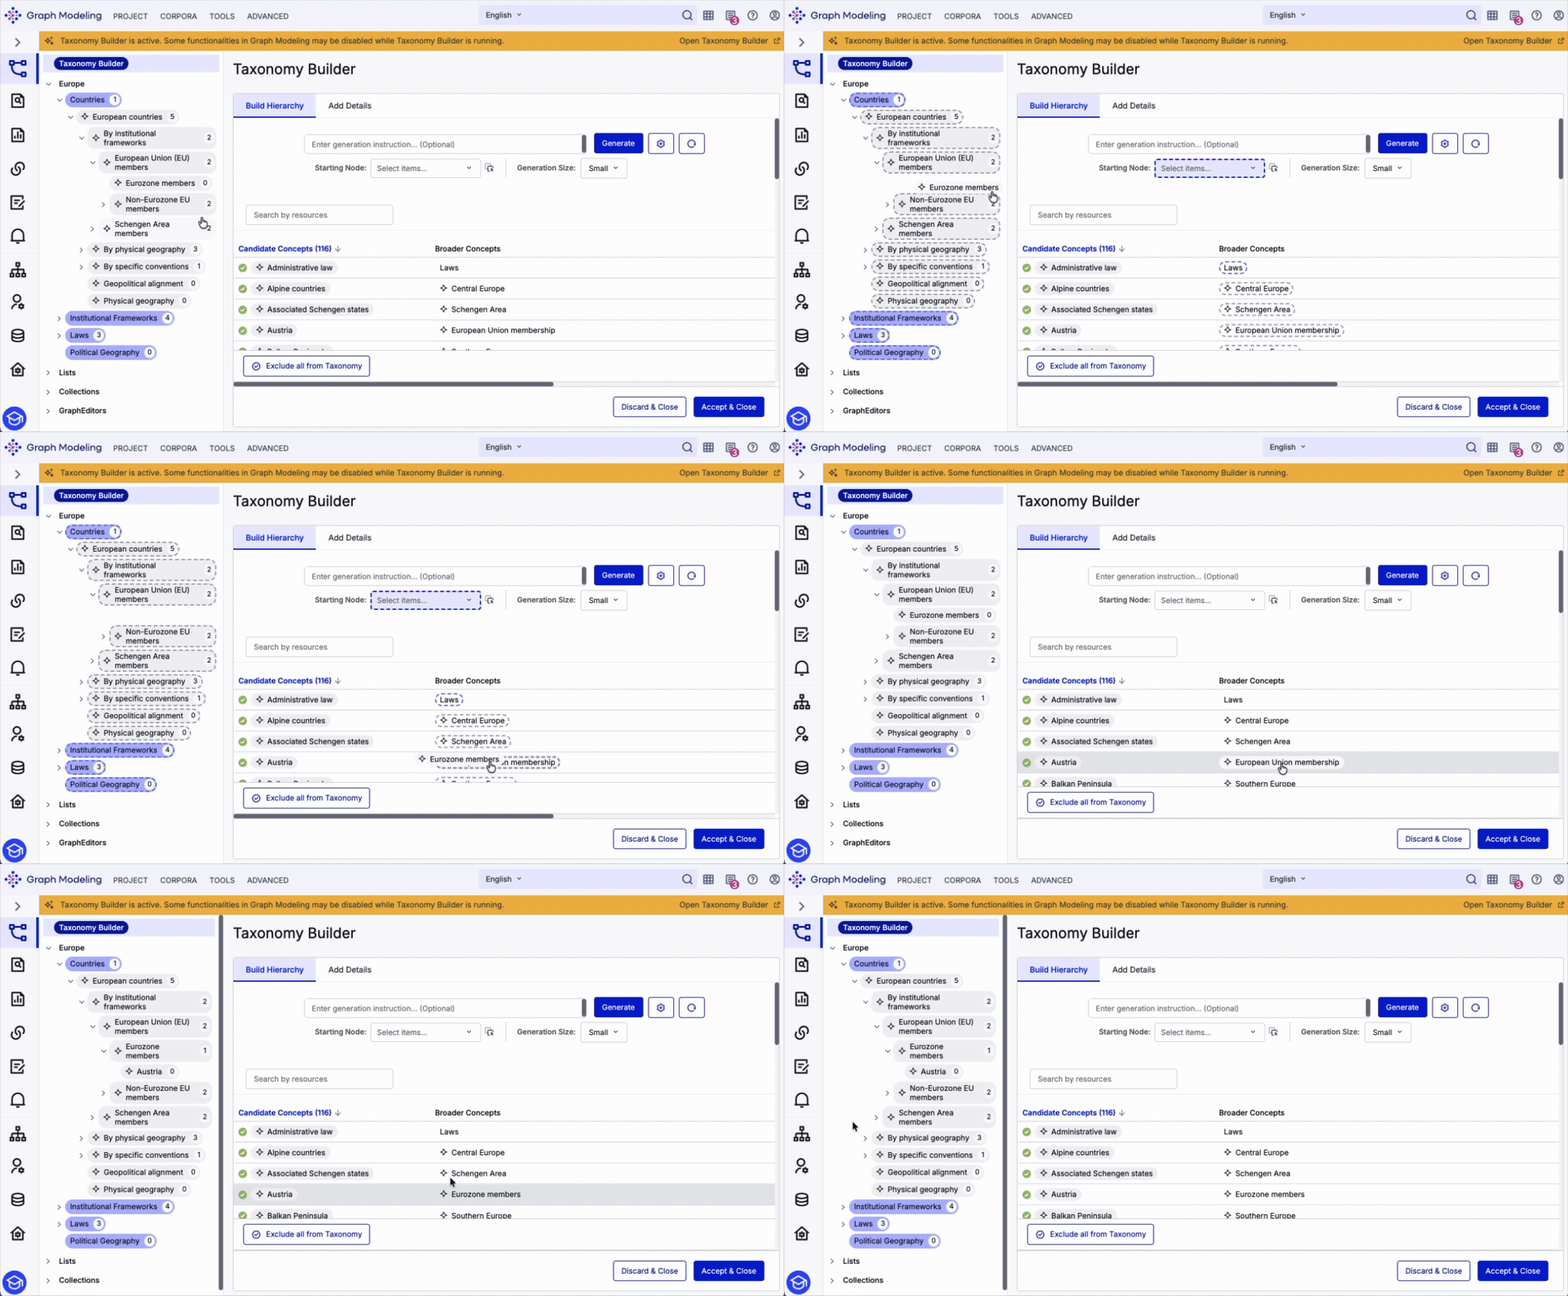
Concepts in the taxonomy tree can be dragged and dropped on top of suggested broader concepts to replace them. Once a suggested broader concept has been replaced, the taxonomy tree on the left will automatically update its structure.
Clicking Generate opens the Taxonomy Builder workflow UI. This will generate suggestions in the Build Hierarchy workflow tab which allows you to organize candidate concepts and their suggested broader concepts.
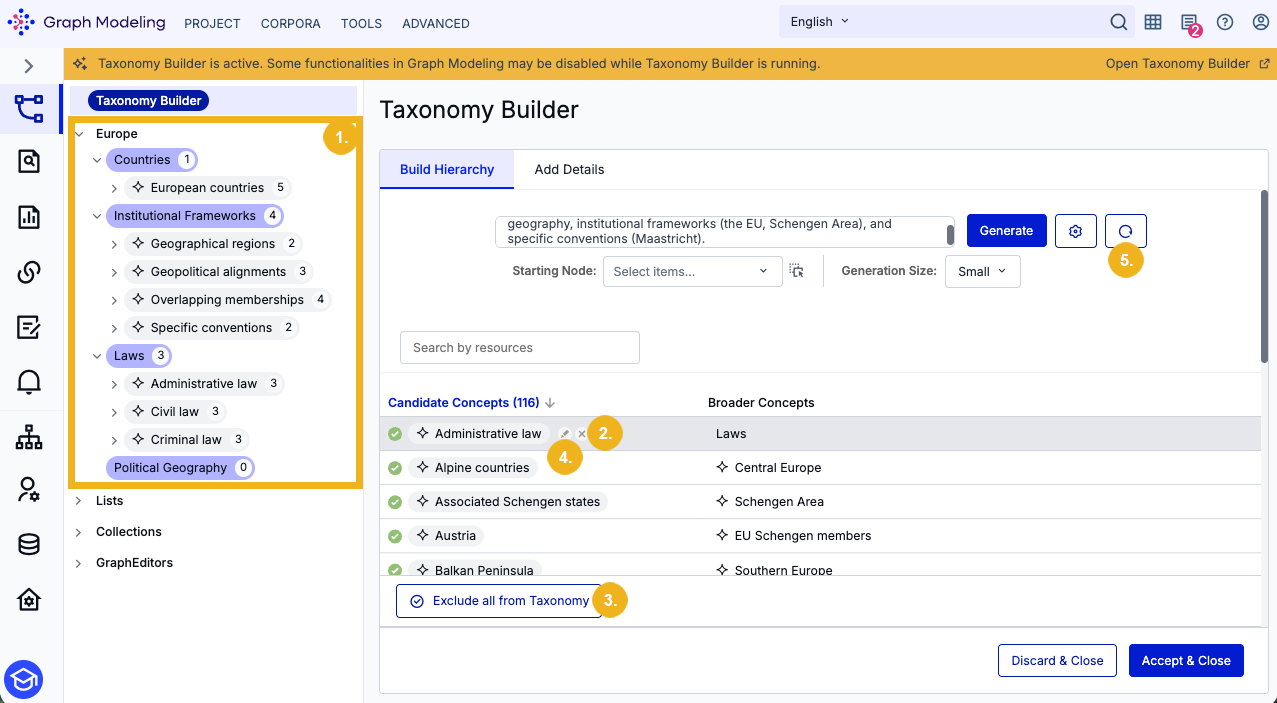
The taxonomy tree on the left (1) visualizes the suggested position of these candidate concepts which are also listed on the right side under Candidate Concepts.
Tip
Click any concept in the Candidate Concept list to reveal its position in the taxonomy tree.
Generated concepts are highlighted in gray and have a Sparkle icon next to them, whereas pre-existing concepts are color-coded depending on their position in the taxonomy tree.
Note
The yellow banner shown in the image above appears whenever there are unsaved changes in the Taxonomy Builder. Note that the Data Validator cannot be started when this is the case.
To deselect a candidate concept, hover over it and select the X icon (2). Deselected candidate concepts will show a + icon instead, which can be clicked to re-add the concept to the candidate concept list and the taxonomy tree on the left.
Tip
By default, all generated candidate concepts are selected. Click Exclude all from Taxonomy (3) to deselect all candidate concepts. This allows for a thorough workflow where all candidate concepts can be assessed carefully and individually.
To rename a candidate concept, hover over it and select the pen icon (4) and enter your desired label.
You can use the Restart button (5) to permanently delete all generated data and start the Taxonomy Builder process from scratch. Clicking the button will open a dialog warning where you can select Start Again to follow through with this action.
Tip
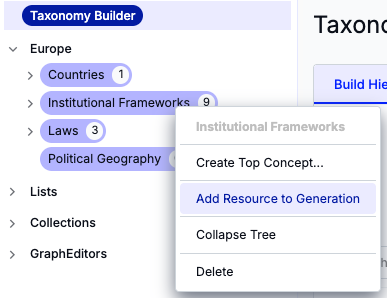
Continuously expand your taxonomy starting from different source nodes by dropping any concept from your taxonomy tree into the Source field. Alternatively, right-click any concept in your tree and select Add Resource to Generation from the context menu. Once you have selected your new source node click Generate. This workflow allows you to expand your taxonomy until it has reached the desired depth.
Once you are done building the foundation for your taxonomy you can proceed to the Add Details tab. Alternatively, if you wish to add no more details to your taxonomy, you can select Accept & Close to apply the currently generated content to your taxonomy. Click Discard & Close to exit the Taxonomy Builder, discarding all currently generated content.
Important
A Taxonomy Builder session remains active until you explicitly click Discard & Close or Accept & Close. Your progress and generated results are tied to your user profile and the specific project; they will persist even if you switch tabs, navigate away, or log out of the system.
Note
We are currently working to expand the Taxonomy Builder's capabilities with the following features:
Expansion from Documents: The Taxonomy Builder will gain the ability to expand an existing taxonomy based on a user-provided corpus.
Adding Attributes and Relations: Integration of LLM and corpus-based methods to generate SKOS relations and ontology-based attributes/relations.